1. 前言
OpenStack的安装是一个难点,非常难。哪怕已经安装过OpenStack,再次安装,也不敢说一定成功。安装过程中某处细微变化,也许就会出现各种奇葩错误。
总的来说,OpenStack大致分为4种安装方式:
1、基于虚拟机的快速体验安装。
这是最简单的方法,把搭建好环境的虚拟机运行起来即可。但是,遗憾的是,在网上没有找到OpenStack的虚拟机镜像。
2、基于DevStack快速脚本安装。
这是OpenStack官方推荐的方式,安装速度较快,基于Folsom版本。但是,安装过程中一言不合就报错,困难重重。
3、使用自动化安装工具。
RDO、Fuel、Puppet、Chef、Salt等,都是OpenStack的自动化安装工具。说是自动化安装工具,实际上安装配置时,也是非常繁琐。
4、手动安装。
这种方式最困难,但是实际生产环境下,基本都需要手动安装。
本文,就探讨一下在VirtualBox中使用DevStack安装OpenStack的步骤。也就是说,我们要自己创建一个OpenStack的虚拟机镜像。
2. 系统准备
1、VirtualBox中安装好Ubuntu16,至少需要内存4G,硬盘20G。
2、配置好Ubuntu16的网络地址为192.169.56.102。
3、安装好ssh服务,方便远程操作。
步骤2和3可以参考《VirtualBox下CentOS7和Ubuntu16.04网络配置》。
3. 环境准备
1、安装gitapt-get install git
2、安装pythonapt-get install python
3、添加stack用户useradd -s /bin/bash -d /opt/stack -m stack
4、给stack用户添加sudo权限echo "stack ALL=(ALL) NOPASSWD: ALL" | sudo tee /etc/sudoers.d/stack
5、切换到stack用户su - stack
6、下载devstackgit clone https://git.openstack.org/openstack-dev/devstack
或者git clone https://github.com/openstack-dev/devstack
推荐从github下载。速度缓慢,请耐心等待。
7、切换到stable/newton分支cd devstack
git checkout stable/newton
4. 配置devstack
4.1. 创建local.conf
在devstack目录下创建local.conf文件,内容如下:
1 | [[local|localrc]] |
4.2. local.conf说明
1、密码配置
1 | ADMIN_PASSWORD=voidking |
2、git仓库
devstack默认会从 https://git.openstack.org 上下载openstack组件,那是相当的慢。故在local.conf必须要把仓库替换成其他源,国内推荐git.trystack.cn。注意,trystack用的是http,不是https。
1 | GIT_BASE=http://git.trystack.cn |
或者
1 | GIT_BASE=https://github.com |
3、branch
保证与devstack的branch一致,避免不可预知的问题。
1 | NOVA_BRANCH=stable/newton |
4、Service/Dashboard IP
与虚拟机IP保持一致。
1 | HOST_IP=192.168.56.102 |
4.3. 更换pypi源(可选)
devstack默认python源为 https://pypi.python.org ,国内访问非常慢。可以从 https://www.pypi-mirrors.org/ 选一个国内的镜像,把镜像地址写到pip.conf文件,并放到/root/.pip/pip.conf以及/home/stack/.pip/pip.conf。
1 | [global] |
5. 安装devstack
1、切换stack用户,在devstack目录下。./stack.sh
安装过程中,会三次提示输入密码,这些密码需要和local.conf中保持一致。
如果下载报错了。。。,请重新执行:./stack.sh
这一步非常久,郝同学用了六个多小时,请耐心等待。
3、安装成功,提示:
1 | ========================= |
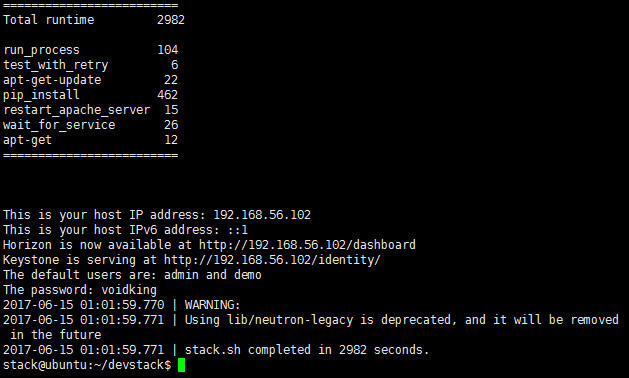
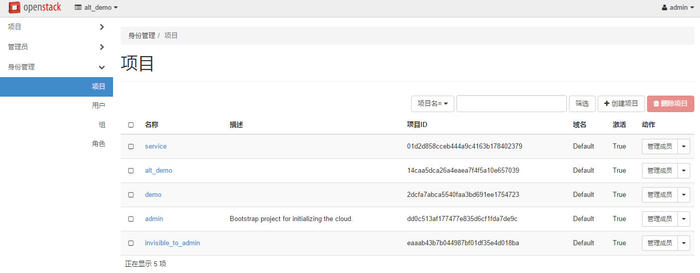
4、大功告成,这时就可以通过浏览器访问openstack服务了!
访问地址:http://192.168.56.102/dashboard
PS:如果这一步无法访问,提示“Internal Server Error”,那么需要手动把ip地址加到local_settings.py里的ALLOWED_HOSTS字段。vim /opt/stack/horizon/openstack_dashboard/local/local_settings.py
1 | # If horizon is running in production (DEBUG is False), set this |
然后重启apache2服务,service apache2 restart
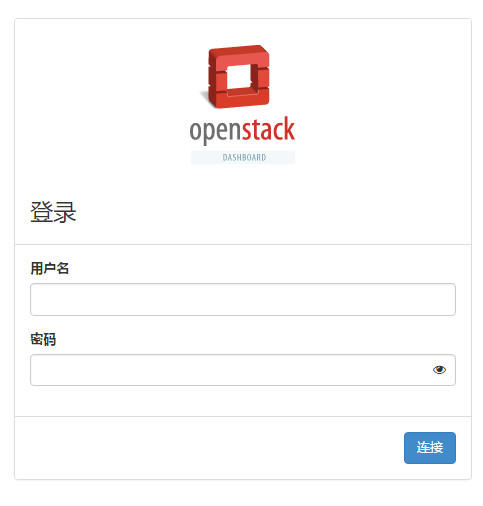
5、输入用户名admin,密码voidking,进入管理面板。